Power to the People: Control Your Own Trigger Destiny with Webhooks
When we release something new, whether it’s a new SDK or Beeline or a new feature in the UI, we’ll often set a Honeycomb Trigger to keep track of its use. Sometimes we don’t…

By: Ben Hartshorne

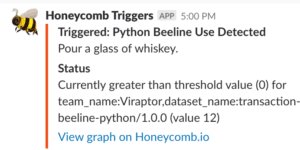
When we release something new, whether it’s a new SDK or Beeline or a new feature in the UI, we’ll often set a Honeycomb Trigger to keep track of its use. Sometimes we don’t necessarily have a customer we know is immediately going to use the feature in question, and we’re interested in when it happens.

This is great! err… Wait, it’s red — that’s bad, right? Thankfully, a little while later…

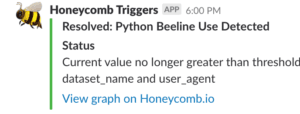
Whew! The Trigger resolved! Everything’s fine here! Thank goodness nobody’s using the Python Beeline anymore!!
Soooo…yeah, that doesn’t really map to what we’re trying to achieve with this kind of Trigger. And we know some of our customers want to do stuff like this too! Well, not with Honeycomb releases necessarily, but many of you are familiar with the situation where there exist rare events that you want to be informed about when they happen, but you don’t care about the subsequent “recovery”. So we received some feature requests – can we customize the Slack text some more? Change the colors so it’s not red on detection? Make the notification smaller, suppress the resolution? Templatize the content?
We’ve known since the beginning that Triggers will never fit every use case. We don’t really want to build out an enormous amount of brittle UI to try and fit them in to all situations. Instead, we have handed you that power instead.

We’re happy to announce a new Webhook Integration you can use as a Trigger Recipient!
Instead of trying to chase down all the places we could send Trigger notifications, with all the variations in content that would be necessary to fit every niche, we’re going to let you customize the Trigger notification into exactly the right shape for your requirements.
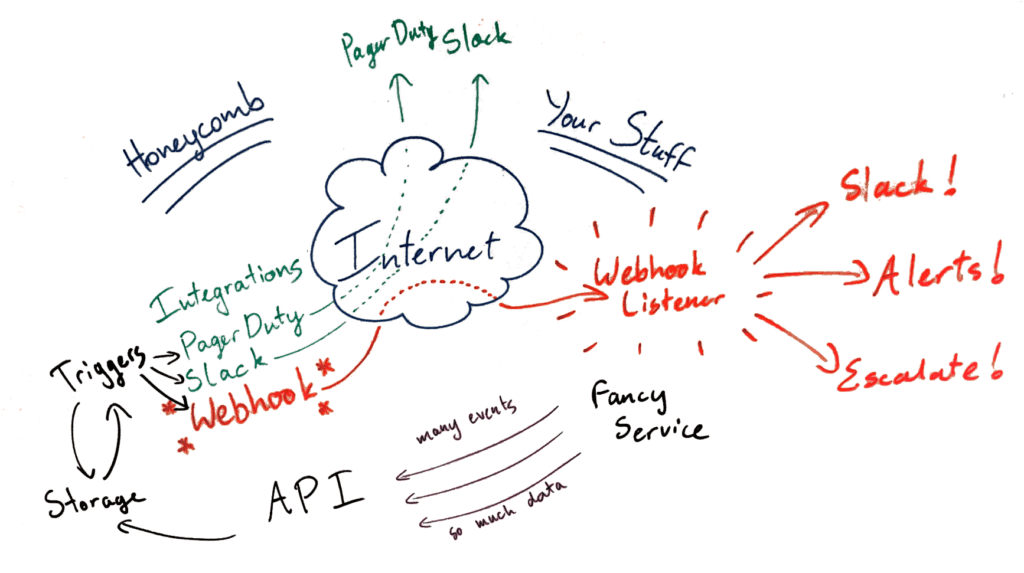
Here’s how they work: when setting up a Trigger, you have the option to give it a webhook as a recipient. Webhook, in this sense, is just a fancy word for “a URL that you control.” When the Trigger fires, we’ll send an HTTP POST with a JSON body to your webhook with all the contents that would be in the Trigger notification, including whether it is in triggered or resolved state, the list of groups that caused the Trigger to fire, and a link back to the Honeycomb graph showing the query.

After that, the world’s your oyster! You can suppress recoveries! You can augment the data with content from other systems and re-post to Slack! (Or dispatch a carrier pigeon! It’s really up to you!)
The path to freedom
So how do you set one up? The first step is to write the code to receive the Trigger notification and publish it somewhere reachable from the public internet. To help with this, we have an example listener (written in Go). Included in this example is the data structure you can expect to receive from Honeycomb when the Trigger fires (and recovers).
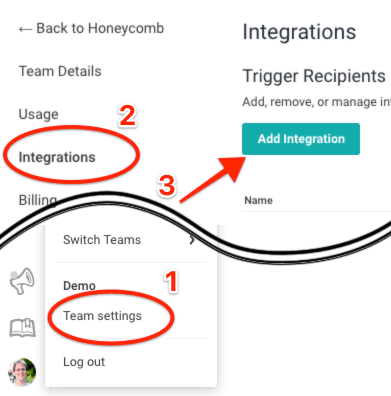
Once you have something up that can receive the notification, go to Team Settings under the Profile menu, then choose Integrations and add a new Integration. Choose webhook, and provide your URL and choose a shared authentication token.
Once you’ve added the integration, it will be available for you in the Trigger creation flow.

Have fun! Let us know how you use webhooks with Triggers! If you tell us something interesting, we might send you something cool in the mail 🙂
Want to know more?
Talk to our team to arrange a custom demo or for help finding the right plan.